


The focaccia recipe I've been making for a decade
Actually it's a schiacciata, and here are all my tips and the variations I love


I have been making this focaccia recipe for over ten years, pretty much the same way, with little variations here and there, mainly how much yeast, or the type of flour or size of the tray to get slightly different results. It is such an easy, foolproof recipe — and so versatile, as you’ll see below.
I make it every week and I always do a version of this focaccia in my cooking classes. I first published this recipe in Florentine, so if you have the book, you’ll find it more or less in the version of schiacciata all’uva, a grape focaccia that I love. But here, a decade on from when I wrote that book, I wanted to go into a lot more about what you can do with this dough.
Focaccia vs schiacciata
First thing, the name. They are essentially the same thing, but there are different styles. In Tuscany, it’s called schiacciata (pronounced ski-a-cha-ta, from the word to flatten or squash, schiacciare) and as Tuscans very much like their baked goods to be crunchy, you will always find schiacciata is a truly crisp, crusty version of focaccia, often quite airy, with plenty of olive oil and plenty of salt on top. If you are looking for the spongy focaccia genovese or even a thick, focaccia pugliese, it is not this one (though, saying that, read the bit on pan sizes…).
Flour
I like to use a good, stone ground flour for this, it’s a bit more interesting and adds nuttiness. You can also mix flours, sometimes I use wholemeal, semola or farro or a mix. Use what you have/like, but note that often wholemeal may need more water and some ancient grains may need a little less water.
Yeast
I haven’t tried this with sourdough (sorry, ours died after we were no longer in lockdown!), but I usually use fresh yeast for this. Active dried yeast is the same, I just mix the yeast with a bit of water to let it dissolve before mixing everything together (see photo). The 7 gr sachets dried yeast /20 gr blocks of fresh yeast are designed to rise 500 gr of flour in about 1 hour, but you can use half of it and it will just need 2 hours to rise. If you’re in a hurry, then stick to the whole sachet/block but if you have the time, why not try this. You can also stick the dough to rise slowly in the fridge (highly recommended if you have the time), say overnight for 8-10 hours. The advantage of a longer rise is better flavour.
The ingredients are so simple
500 grams flour
400 ml water (room temperature)
10 grams fresh yeast (or half a packet of active dried yeast)
1 teaspoon salt, plus more for the top
60-80ml extra virgin olive oil (or as needed!)
Pan size makes a difference
I like to use a metal tray about 40cm x 30 (similar to this one), but if you want a fluffy, spongey focaccia, just use a smaller tray. In fact, you could use one half this size, around 30 x 20cm, with double the height (think something you’d bake a lasagne in) and your focaccia will have nowhere to go but up! If you’d like to make pizza with this dough (it really makes great pizza), then you just need 2 of the 40x30cm metal trays and split the dough into two portions for two tray pizzas.
Variations
You can leave this as is, with olive oil and salt. Or try:
Herbs: you might like to add something as simple as dried oregano or fresh rosemary, or seeds such as sesame, fennel seeds or aniseed.
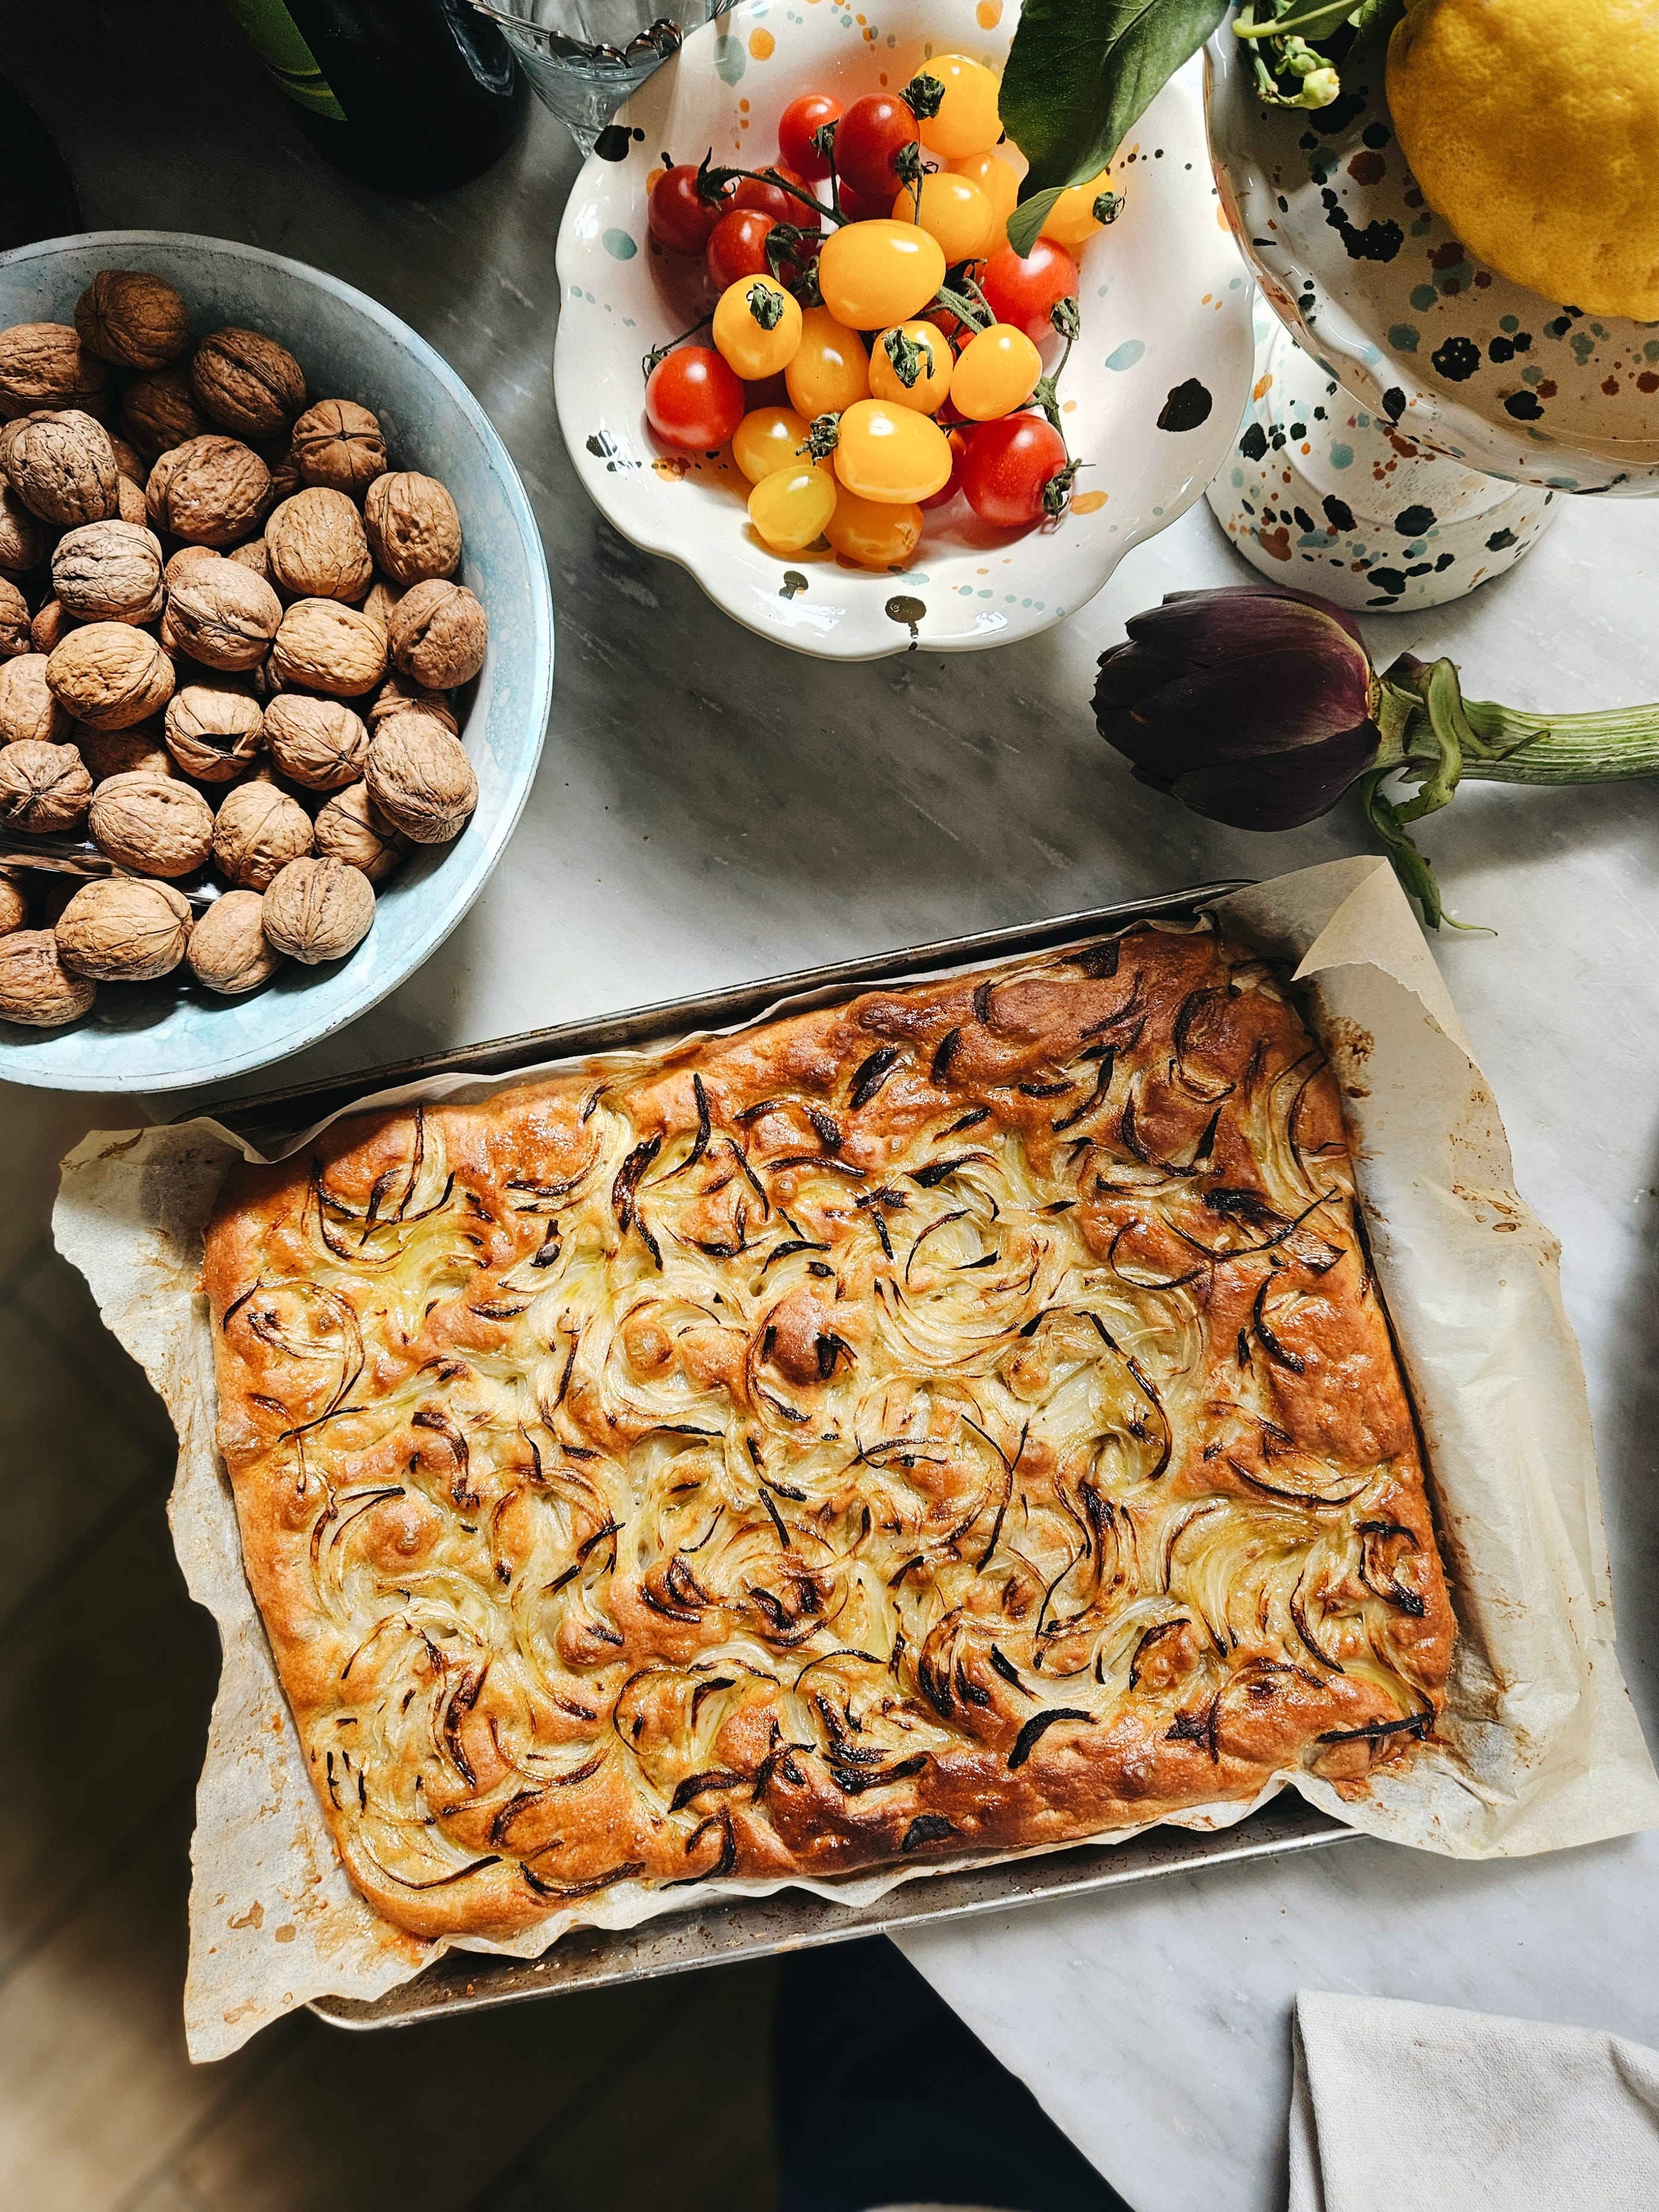
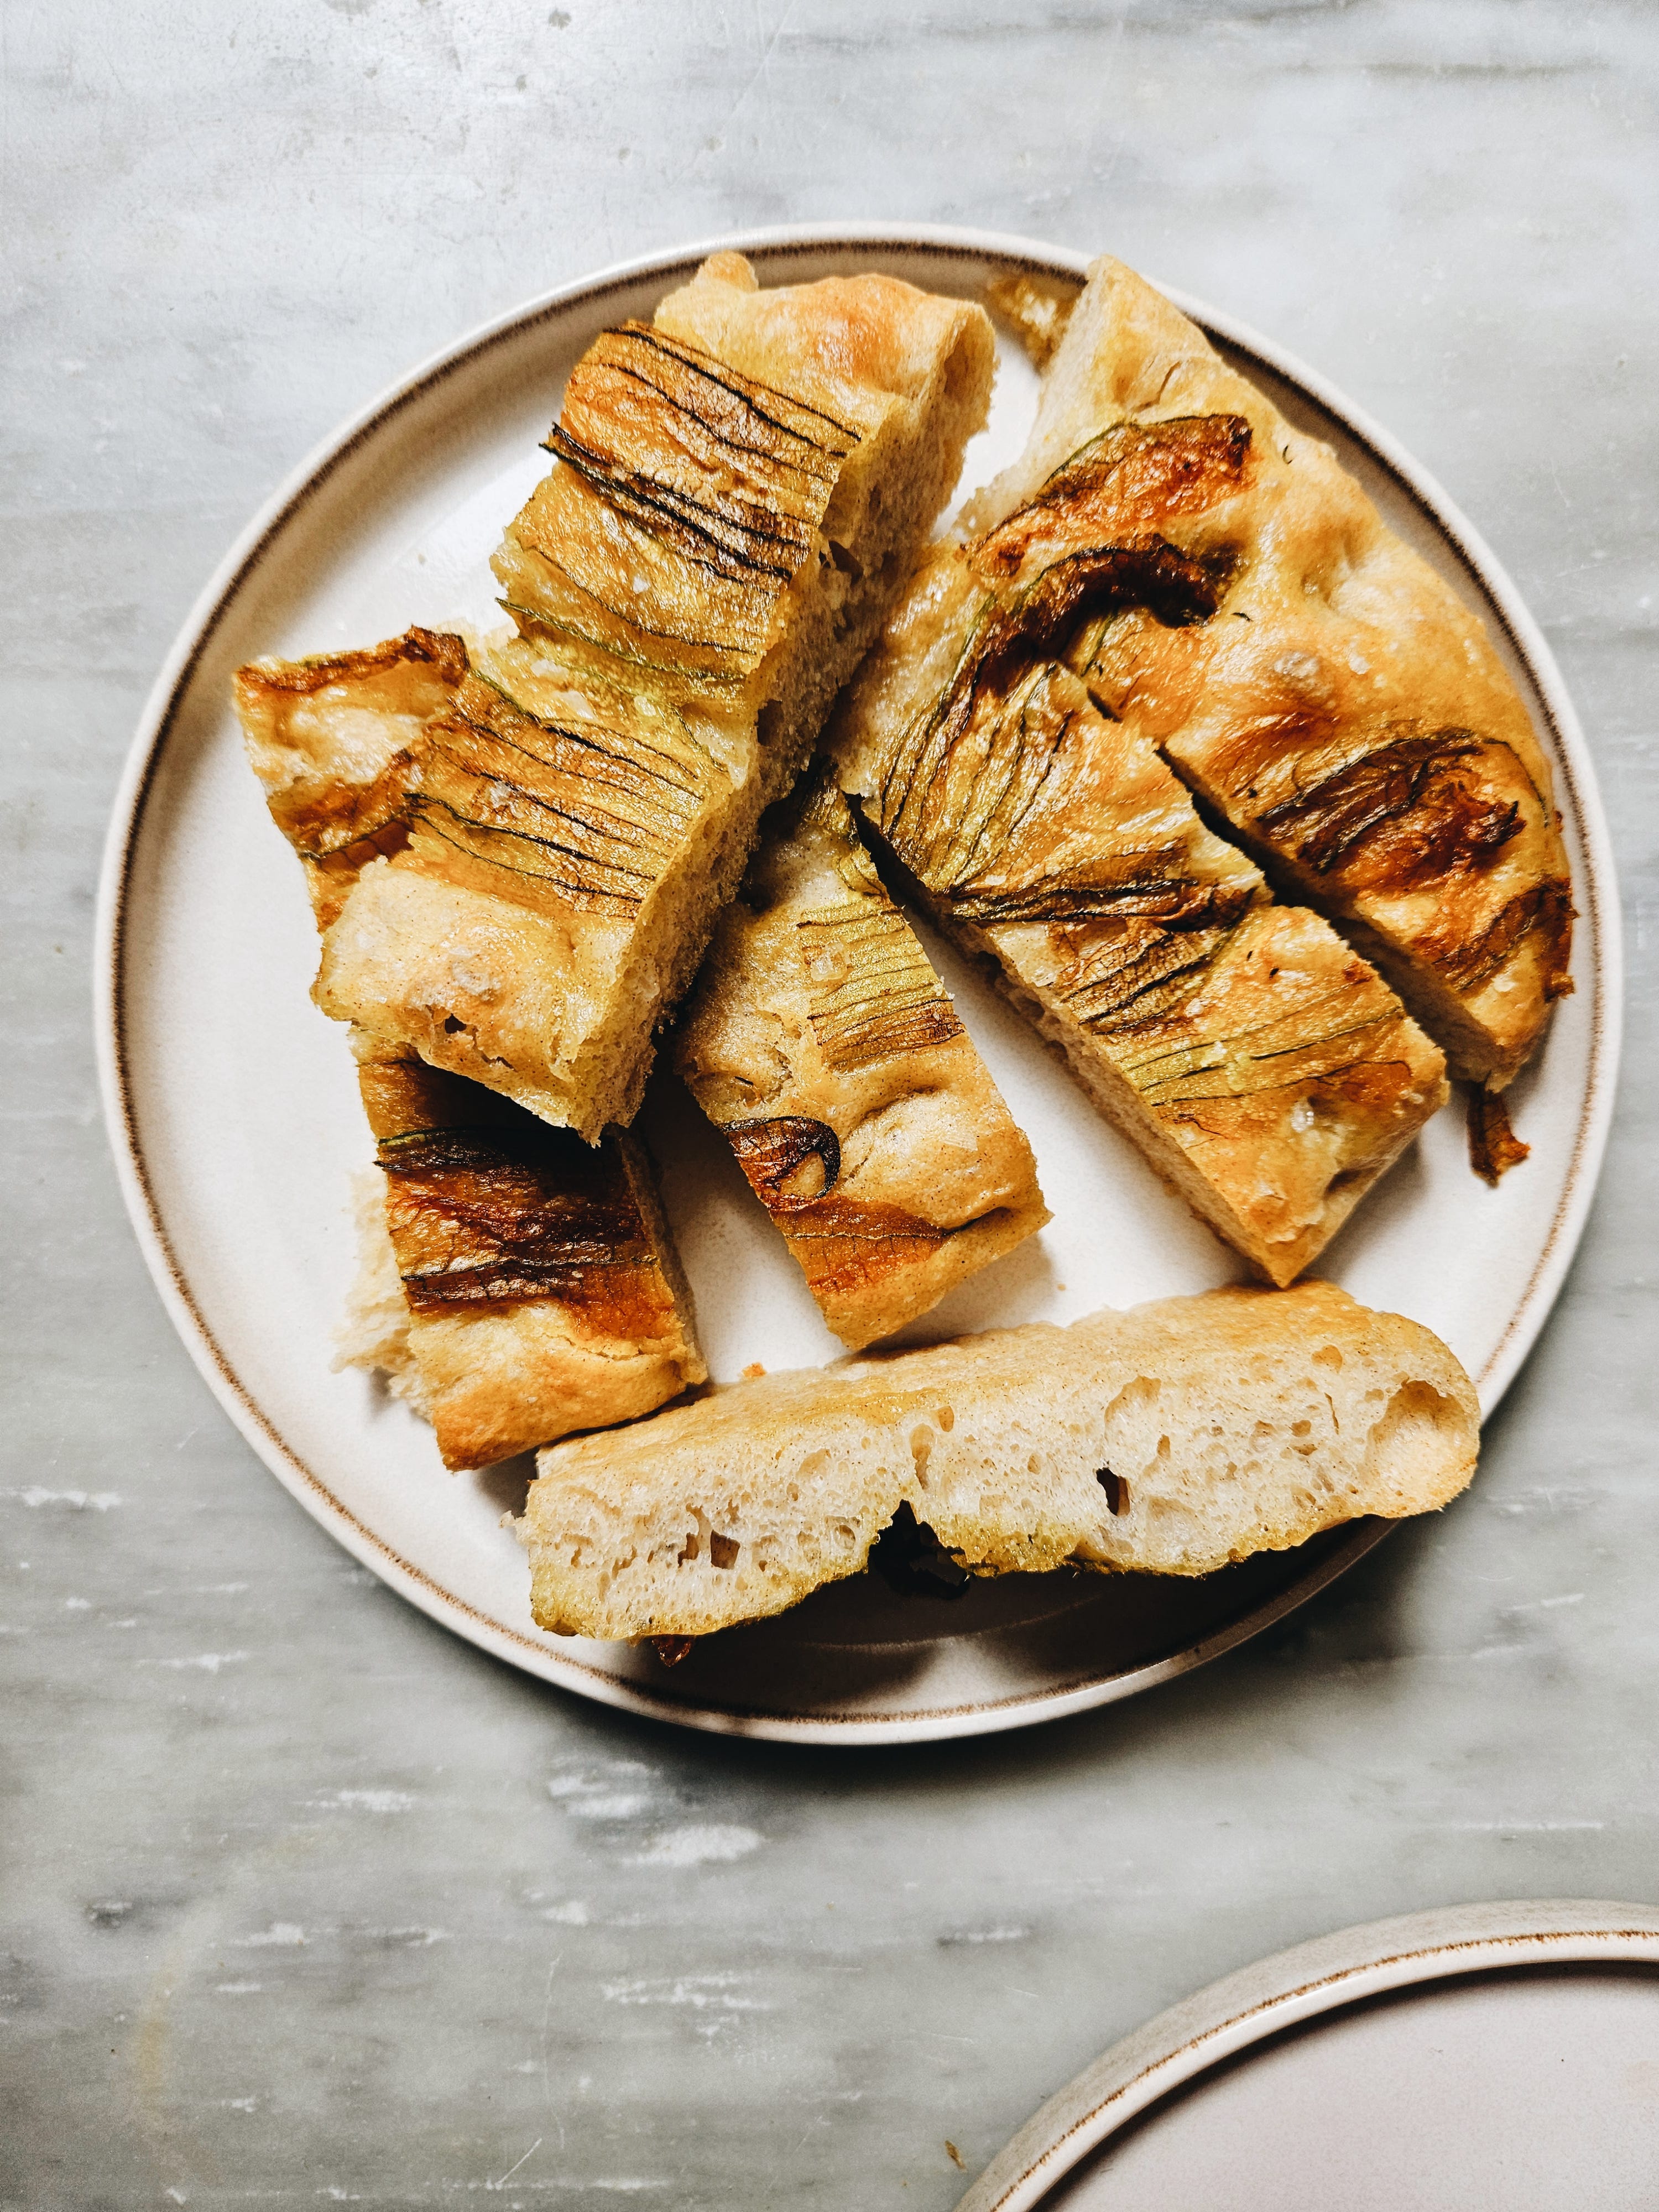
Vegetables: thinly sliced tomato or paper thin slices of potato, zucchini flowers, red onions (lots) are some of my favourites
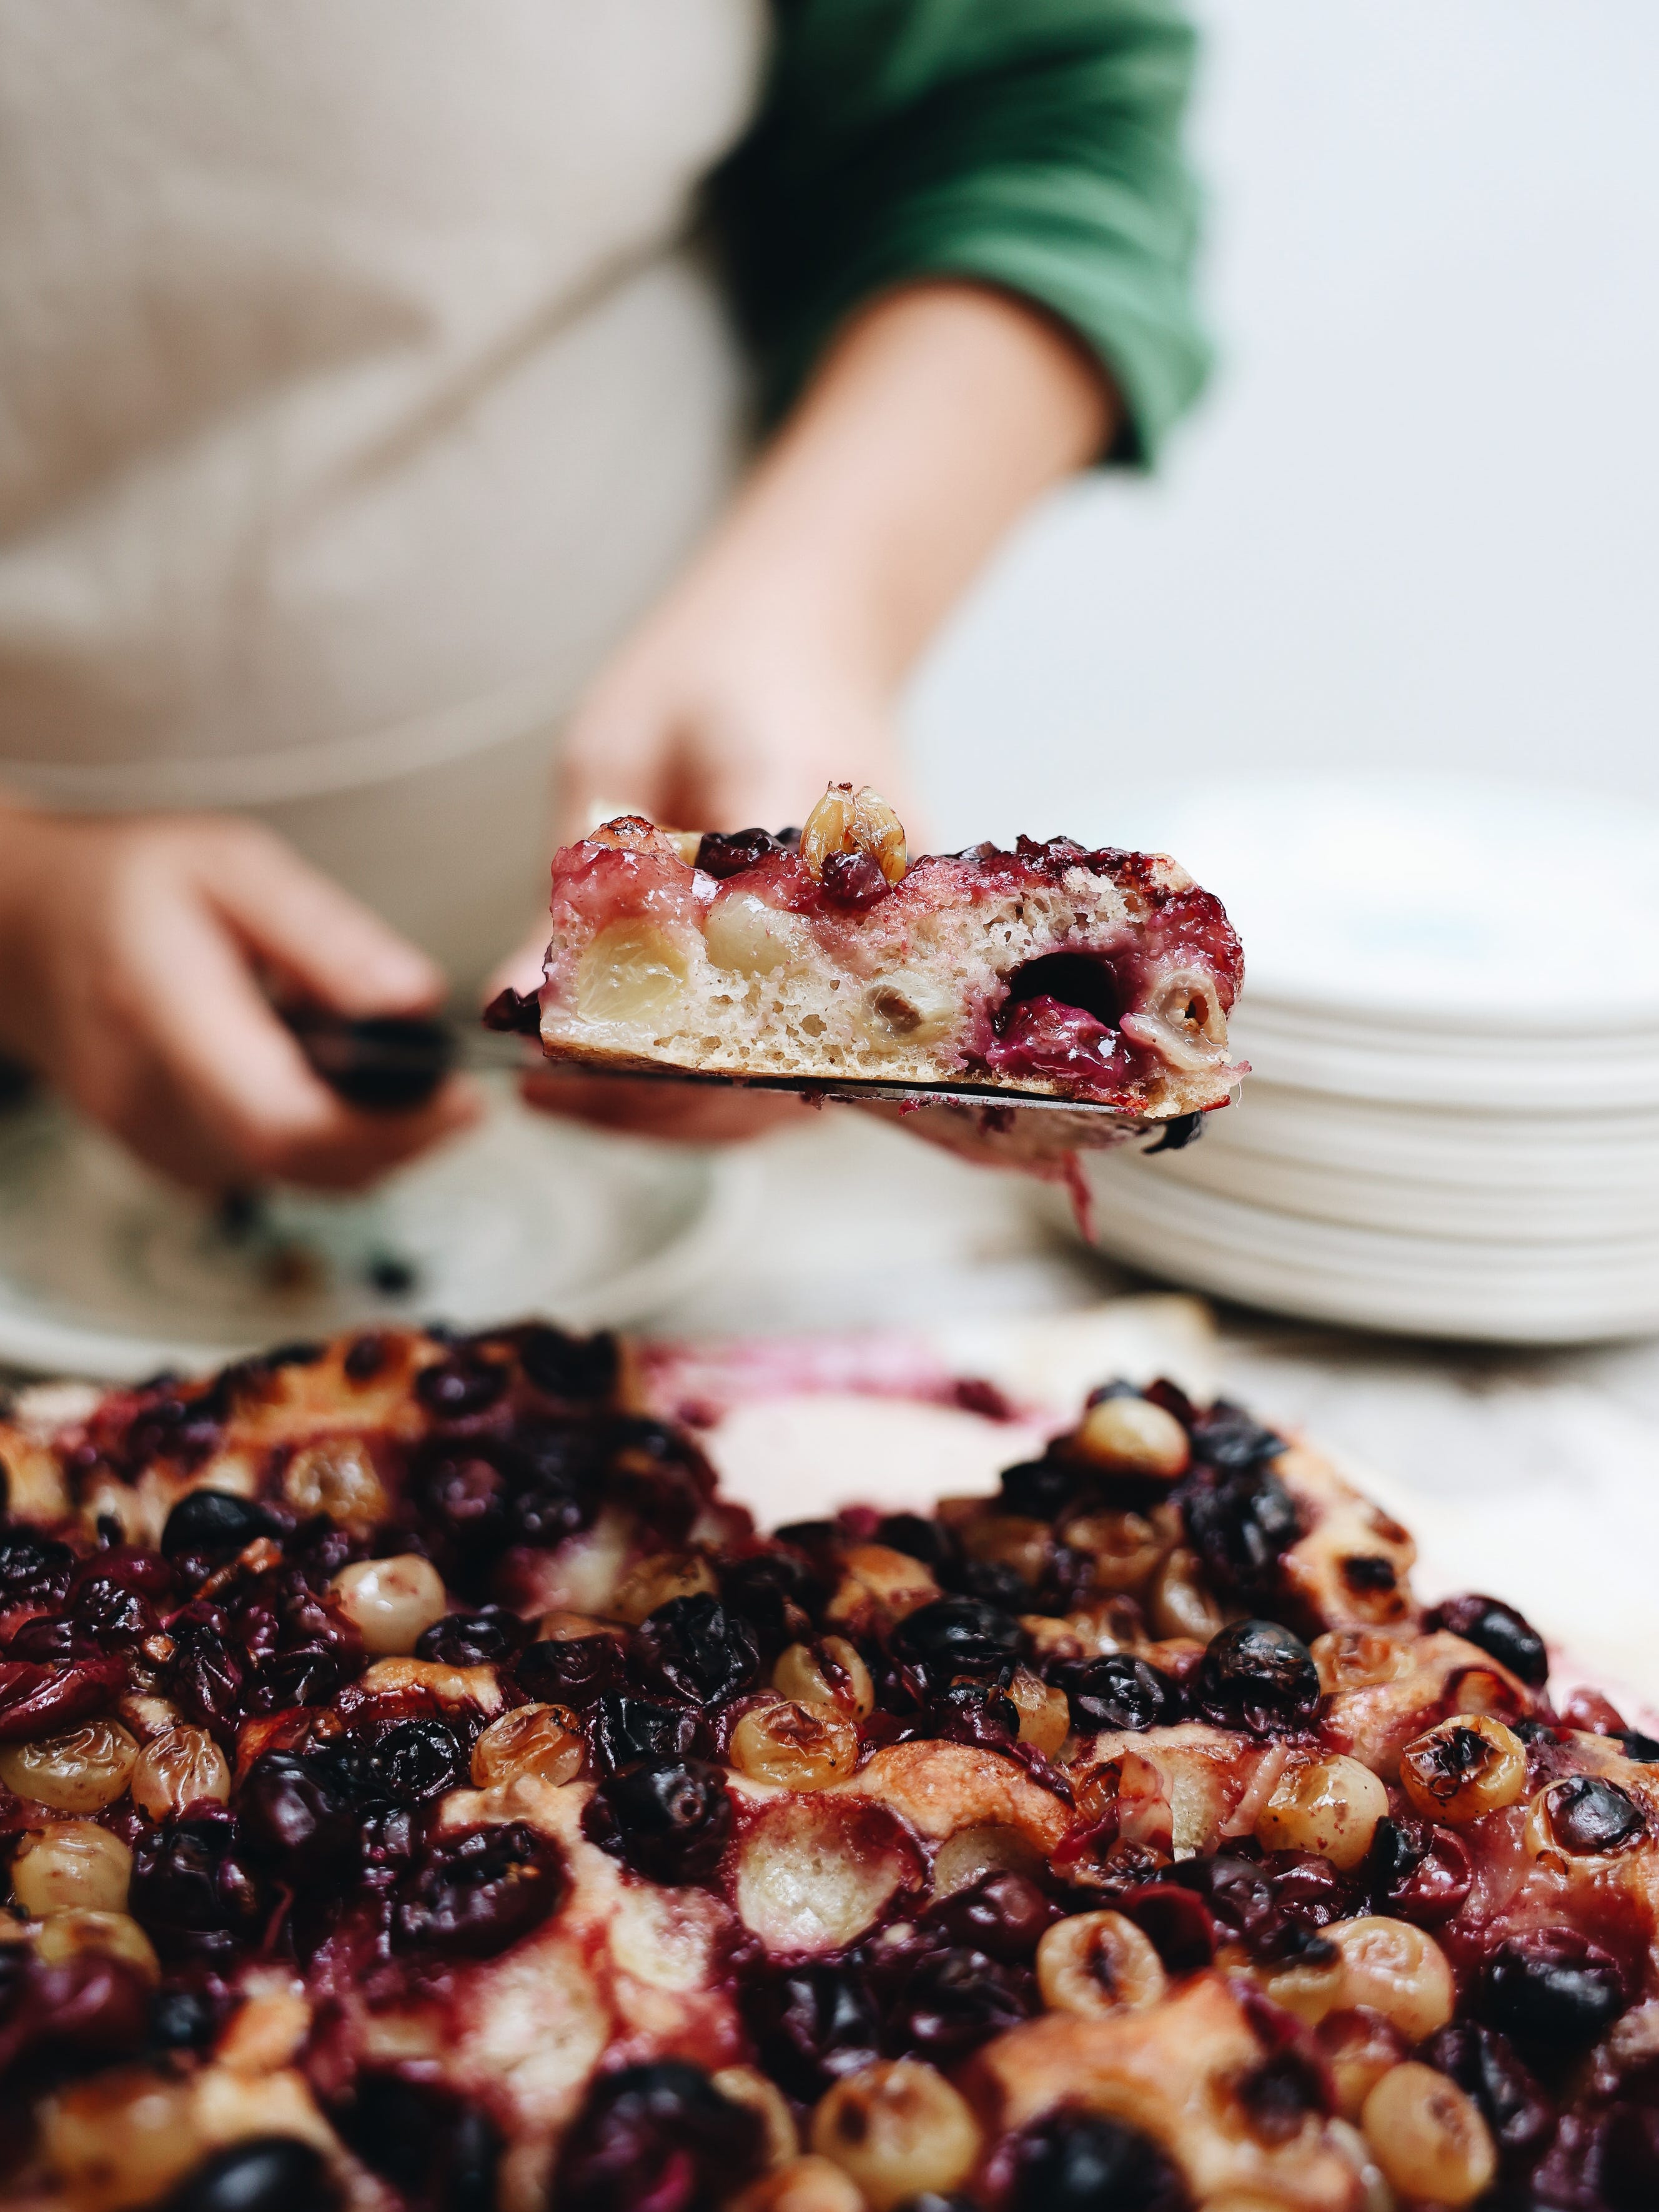
Fruit: schiacciata with wine grapes (schiacciata all’uva) or figs (fresh or dried) is a classic Florentine treat in early autumn.
Others: Anchovies, olives, walnuts (also mixed in the dough)
Fried: Make coccoli, Tuscan fried dough, by taking tablespoons of this and scooping them into hot oil (serve with stracchino cheese and prosciutto!)
Pizza: this dough makes great pizza dough, just spread it as thin as you can and top with your favourite pizza toppings (these are some of mine).
Preparing the schiacciata:
This can be done the night before you want to bake it, or a couple of hours ahead of time.
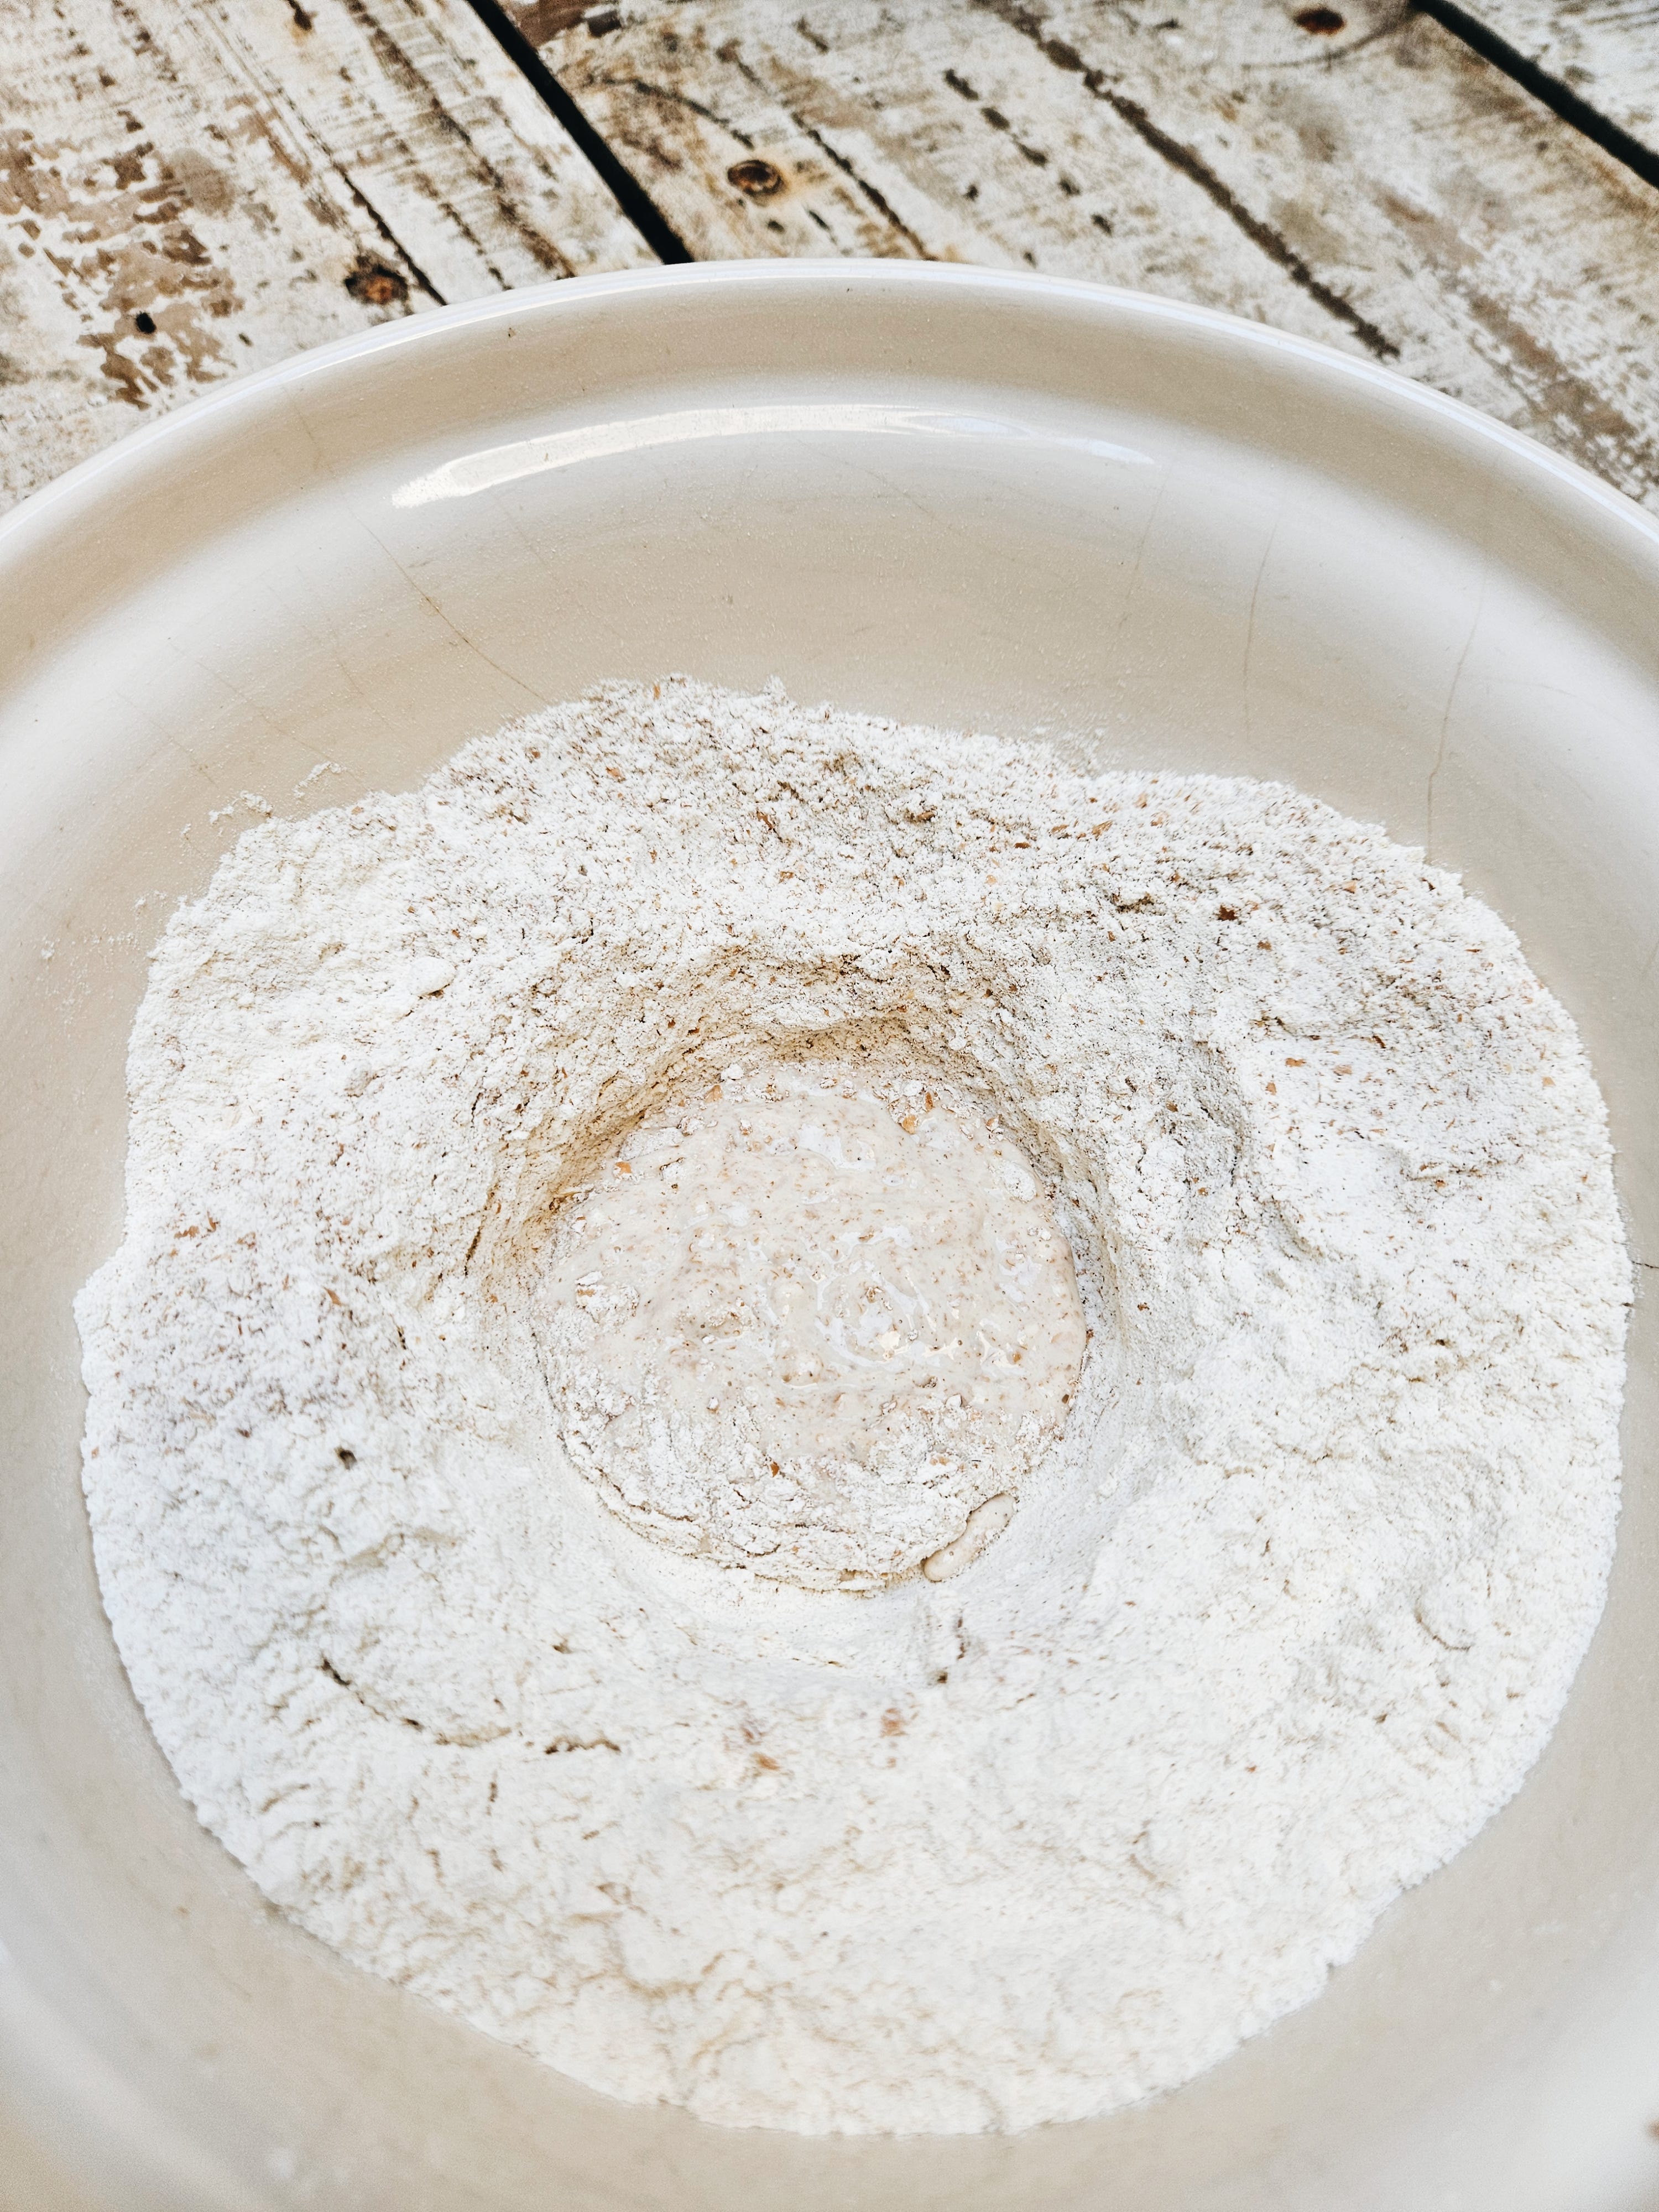
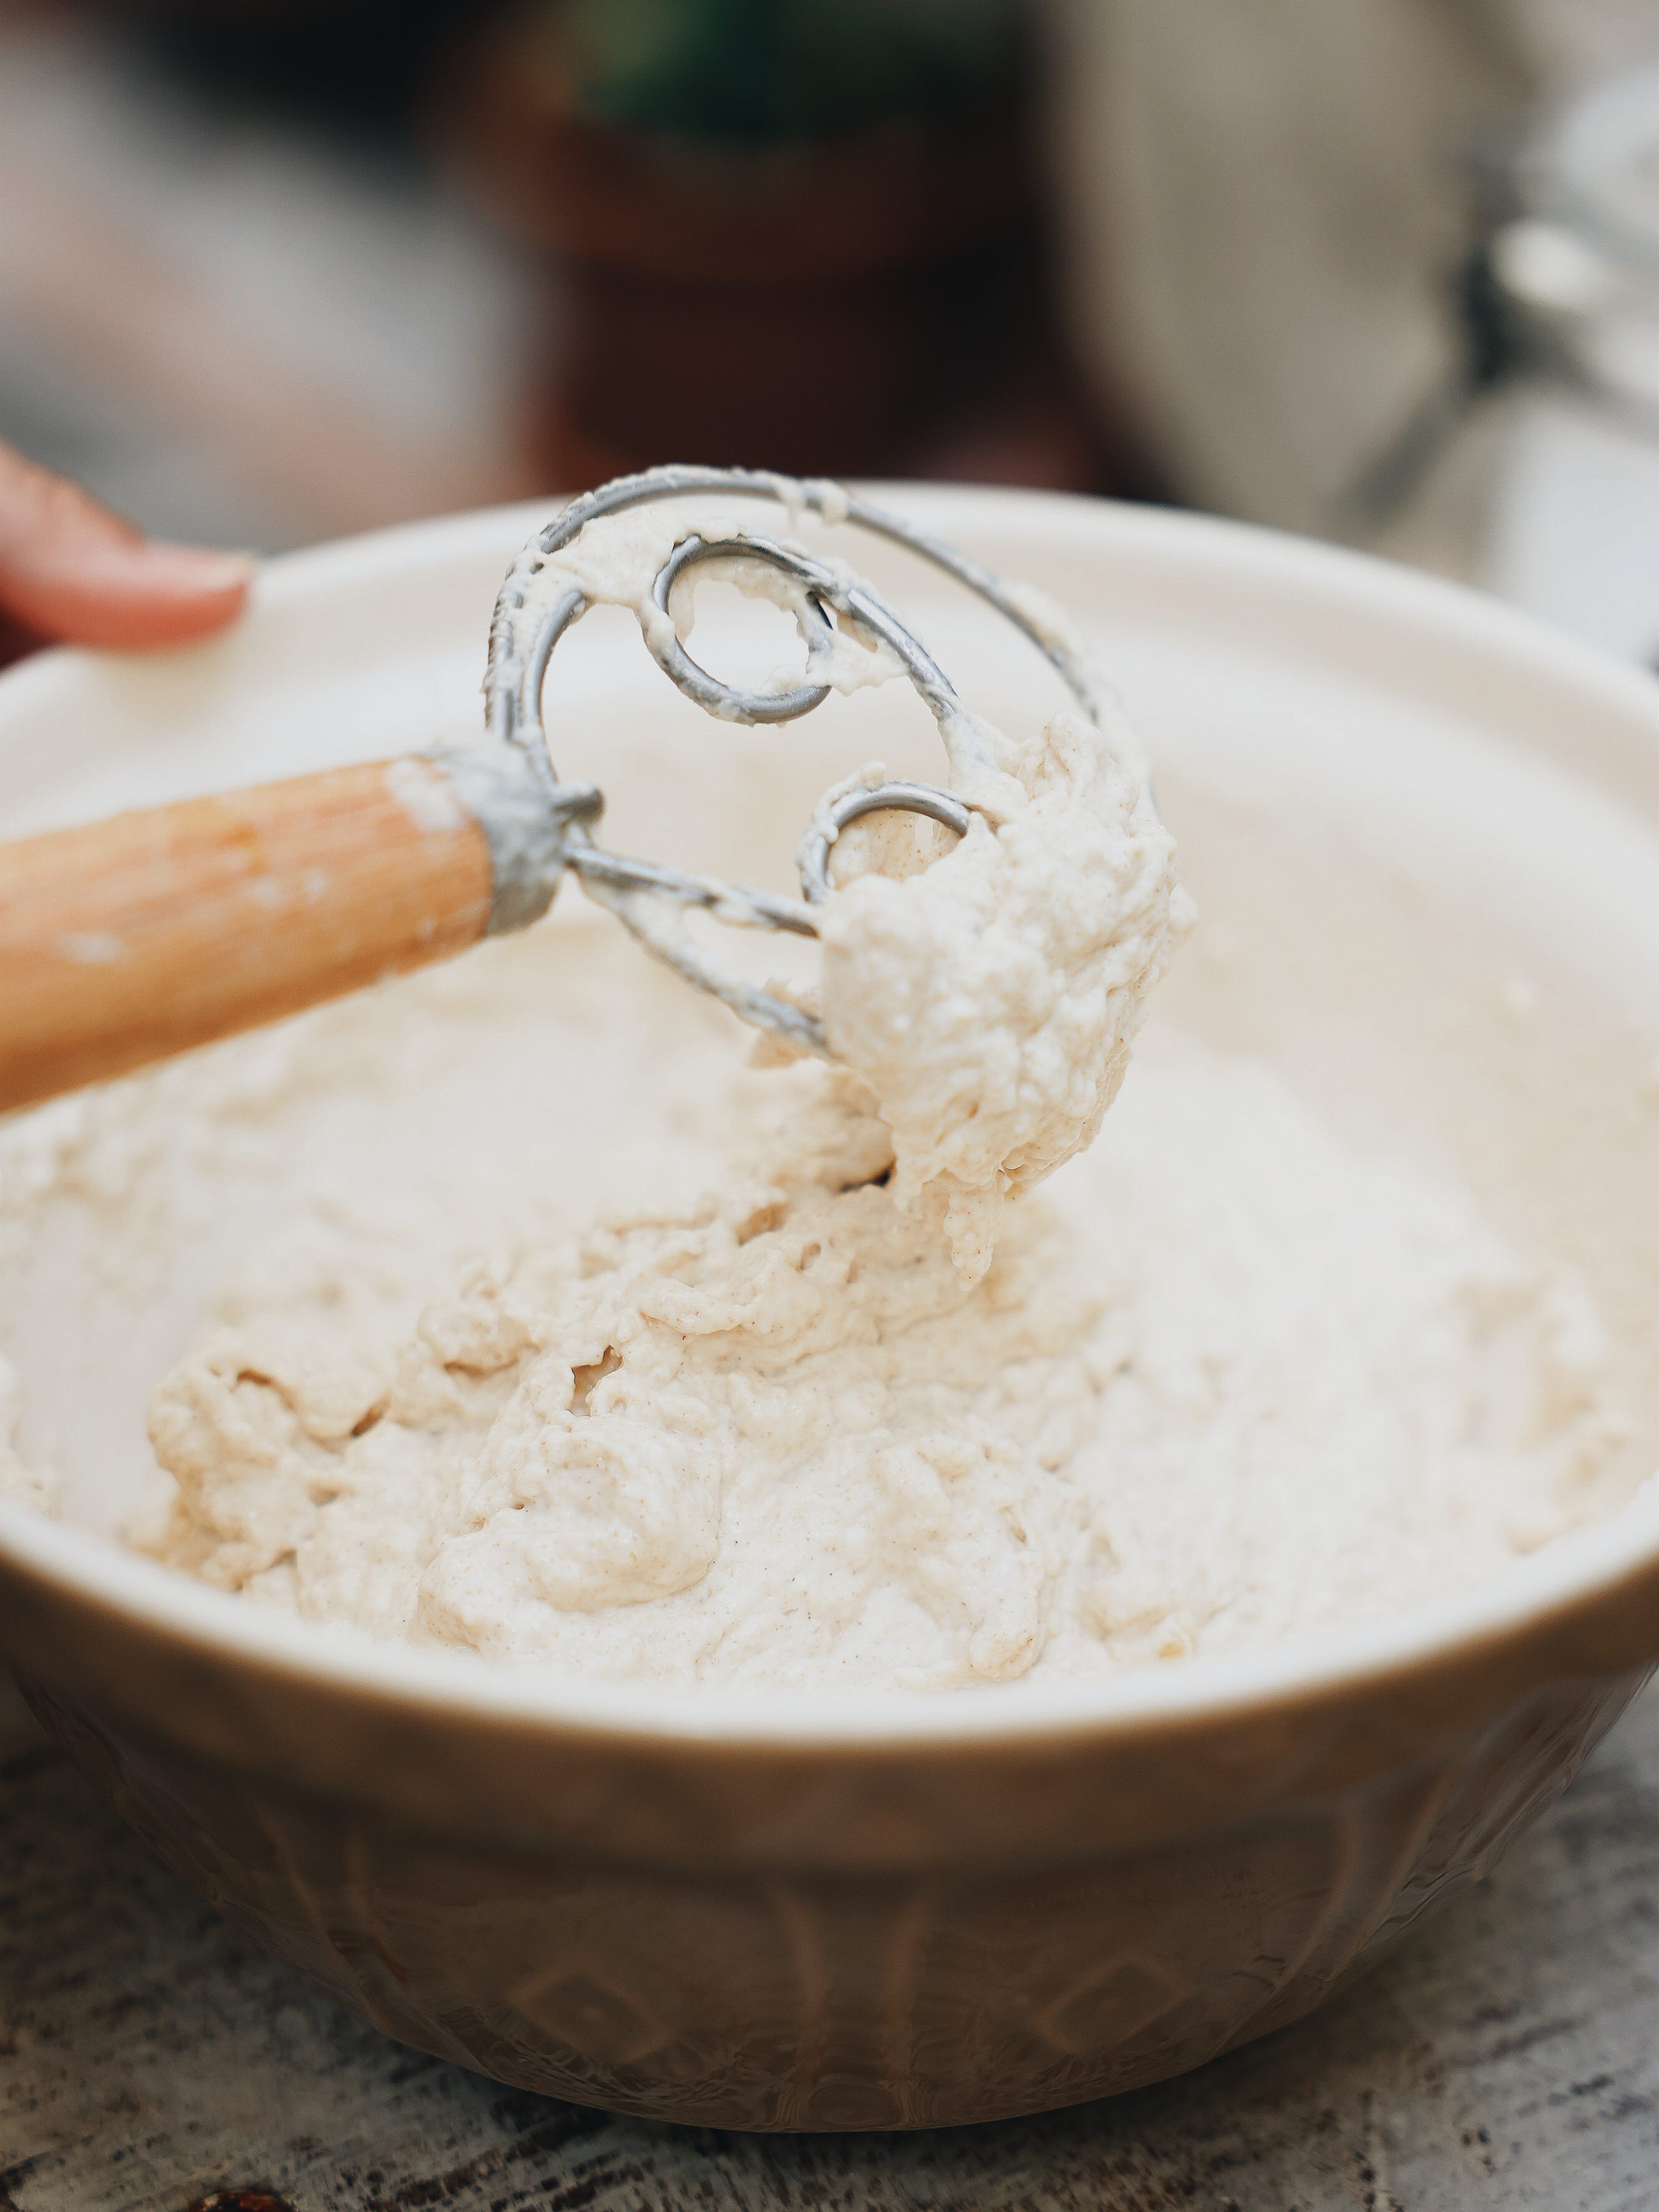
Place the flour in a ceramic or plastic bowl (metal can get cold very quickly, best to avoid for rising bread in). Make a well in the centre of the flour and place the yeast and a few tablespoons of the water to dissolve. Once it has dissolved, add, bit by bit, the rest of the water, stirring the dough after each addition, allowing the flour to absorb all the water before you pour more in. Add a tablespoon or so of extra virgin olive oil to the dough and the salt. It should be quite a wet, sticky dough — like a thick batter (see photo directly below). Drizzle with a bit of olive oil.
Rather than cover with a cloth, which just gets sticky and oily and is a mess, I use an upturned bowl that sits snuggly inside the bowl holding the dough. Set it in a warm place, away from drafts, until it doubles in size (about two hours). If you do this the night before, you can leave the dough in the bowl to rise in the fridge – it will rise slowly over 8-10 hours.
Assembling the schiacciata:
When the dough has doubled in size and looks beautifully puffy and also wobbly, line a 40x30cm (or similar) baking tray with some parchment paper.
With wet hands (the best way to handle sticky dough!), scoop the dough onto the parchment paper (if making pizza or schiacciata all’uva, you’ll need to only do half the amount of dough at first and spread it thinner than described here).
Push the dough to fit your pan; it it quite elastic, you can push with your fingertips like you’re playing the piano, or try pulling it to spread it out. It doesn’t need to be a perfect shape, but try getting the dough to all the corners. Remember wet hands will help.

Scatter over any chosen toppings that you might like. Add a good pinch of flaky sea salt and a good drizzle of olive oil.
Place the focaccia in a warm corner of the kitchen and let it rise a further 30 minutes.
Heat the oven to 200°C, fan forced.
Now, with wet fingers, push down on the surface of the dough here and there (like you are slowly playing the piano) to create little ‘craters’ all over.
If you need an extra drizzle of olive oil, go ahead, let it pool in the little craters you just made. Bake for about 30 minutes or until the dough becomes deeply golden and crunchy on top. The crunchier the better if you want it more like a schiacciata! If you like it softer and fluffier, take off 5 minutes.
Allow to cool at least 10 minutes before digging in (cooling completely is best but it’s hard to resist a warm schiacciata). Either way, schiacciata is best served and eaten the day of baking, or at the most the next day (warmed a little).
Happy baking!

Want to cook with me or explore Italian foodways with me this year?
Market day cooking classes on Tuesdays at Enoteca Marilu, San Miniato (only a few classes left this year!)
Our 5 day Culinary Workshops in San Miniato, Tuscany — one or two spots left in June, September and November!
Our first Emilia Romagna workshop with Ace Camps this October 1-8 — only 2 spots left!
The Japanese Pantry: From Sake to Soy, Essential Ingredients for Japanese Home Cooking, out this autumn
I have some events coming up this October for the release of The Japanese Pantry, my 7th cookbook, in the UK, Rome and Milan, so stay tuned for more soon!
They are all wonderful!
Thank you. Such a great read